Fluent bit
Statement
To append the logs from container location to the server location and then send these logs to cloudwatch log groups but only newly added rows to be added in the cloudwatch.
Step 1
For appending the logs from container location to the server location i have add one cronjob for every 5 min to add the newly added rows in the same files.
*/2 * * * * sudo docker exec -i $(docker container ls | grep ecs-example-cluster-* | awk 'FNR == 1 {print $1}') cat /var/logs/sample.logs.php >> /home/ec2-user/log-1/sample.logs.php
So in above command i have added 3 commands together to append the logs from container to server you can find the details below :
*/2 * * * *
With this cron logs or newly added rows added to the same file in every 2 min of interval
sudo docker exec -i
With this command it will login to a container in interactive mode
docker container ls | grep ecs-example-cluster
This command will list out the containers which having container name start with ecs-example-cluster
awk 'FNR == 1 {print $1}')
With this command it will print the container no.1 after sorting with container name
cat /var/logs/sample.logs.php >> /home/ec2-user/log-1/sample.logs.php
With this command it will see the newly added lines in the file which is in container location and add those lines to the same file which is on server location.
Once the lines will start appending you will see the increase in the size of the file which you can check with the following command :
du -sh
After that create a IAM user on the AWS which having following permissions : CreateLogGroup (useful when using dynamic groups) CreateLogStream DescribeLogStreams PutLogEvents PutRetentionPolicy (if log_retention_days is set > 0) For that follow the steps :
Step 1
In IAM console go to Policies and click on create Policy :

Step 2
After Selecting create policy select JSON as shown in below image :
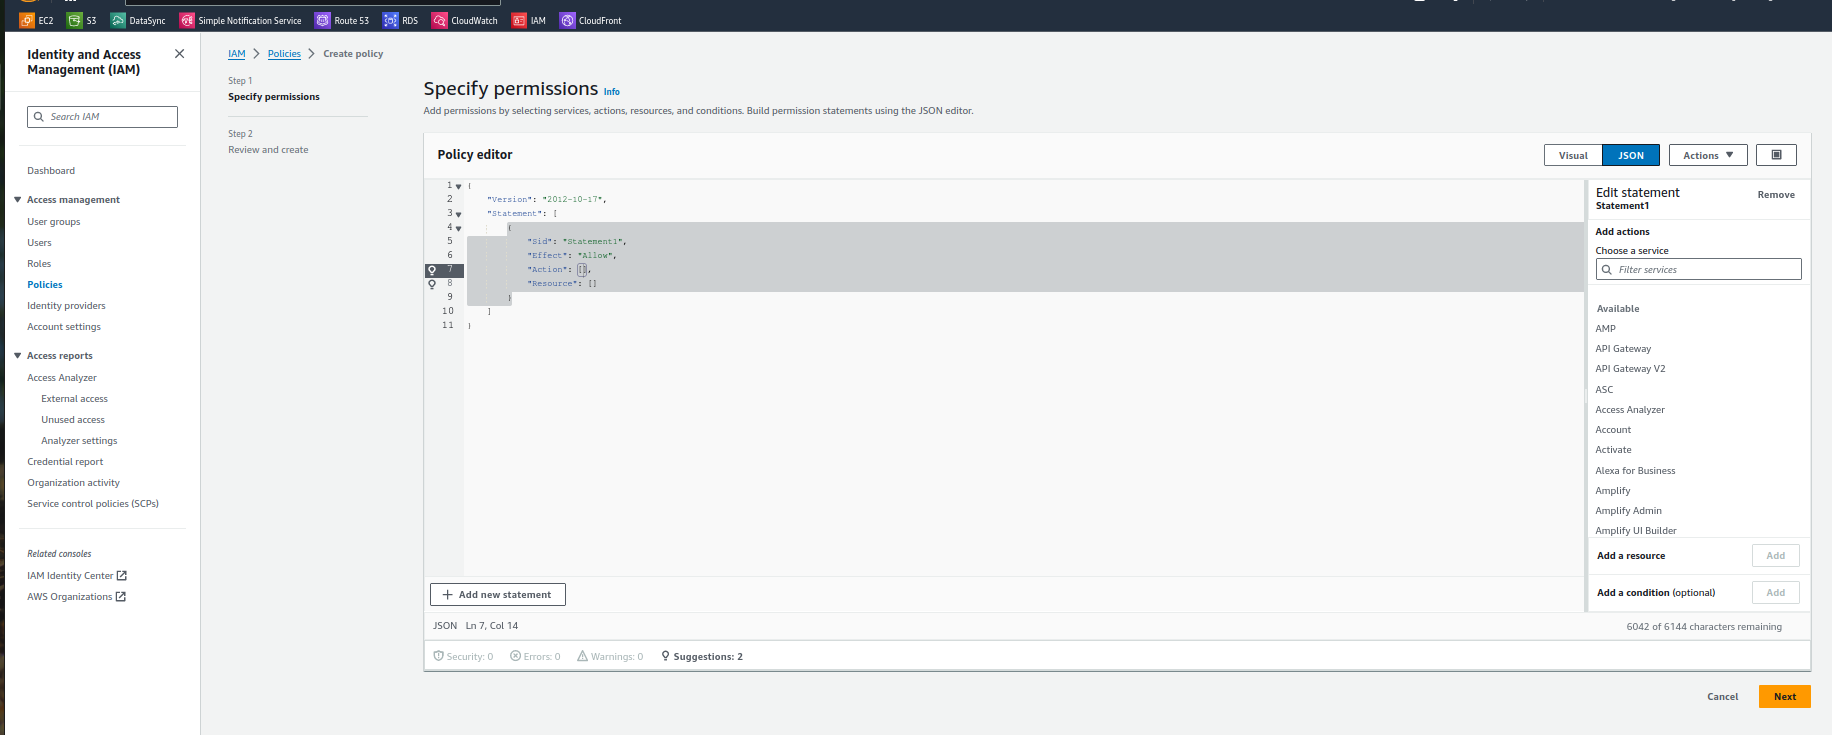
In the Policy editor field add below policy :
{
    "Version": "2012-10-17",
    "Statement": [
        {
            "Effect": "Allow",
            "Action": [
                "logs:CreateLogGroup",
                "logs:CreateLogStream",
                "logs:DescribeLogStreams",
                "logs:PutLogEvents",
                "logs:PutRetentionPolicy"
            ],
            "Resource": "*"
        }
    ]
}
Step 3
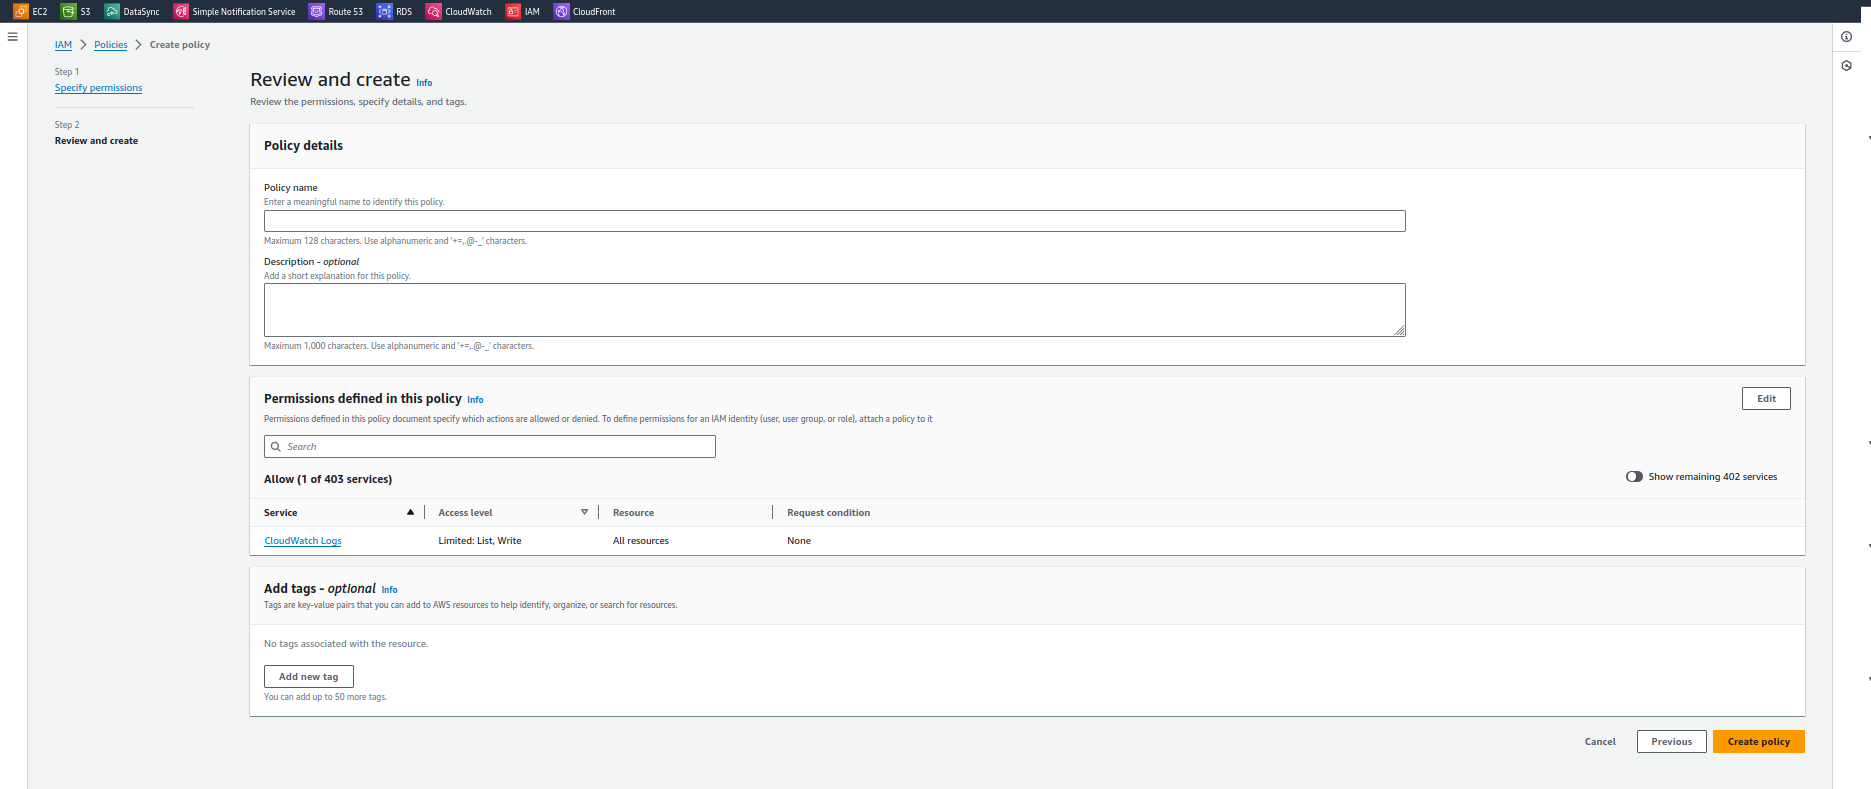
In this Step need to add the Role name, description and the Tag (Optional) as per your use and click on create policy
Step 4
Once your policy created select Users in the IAM service and create a new user

Step 5
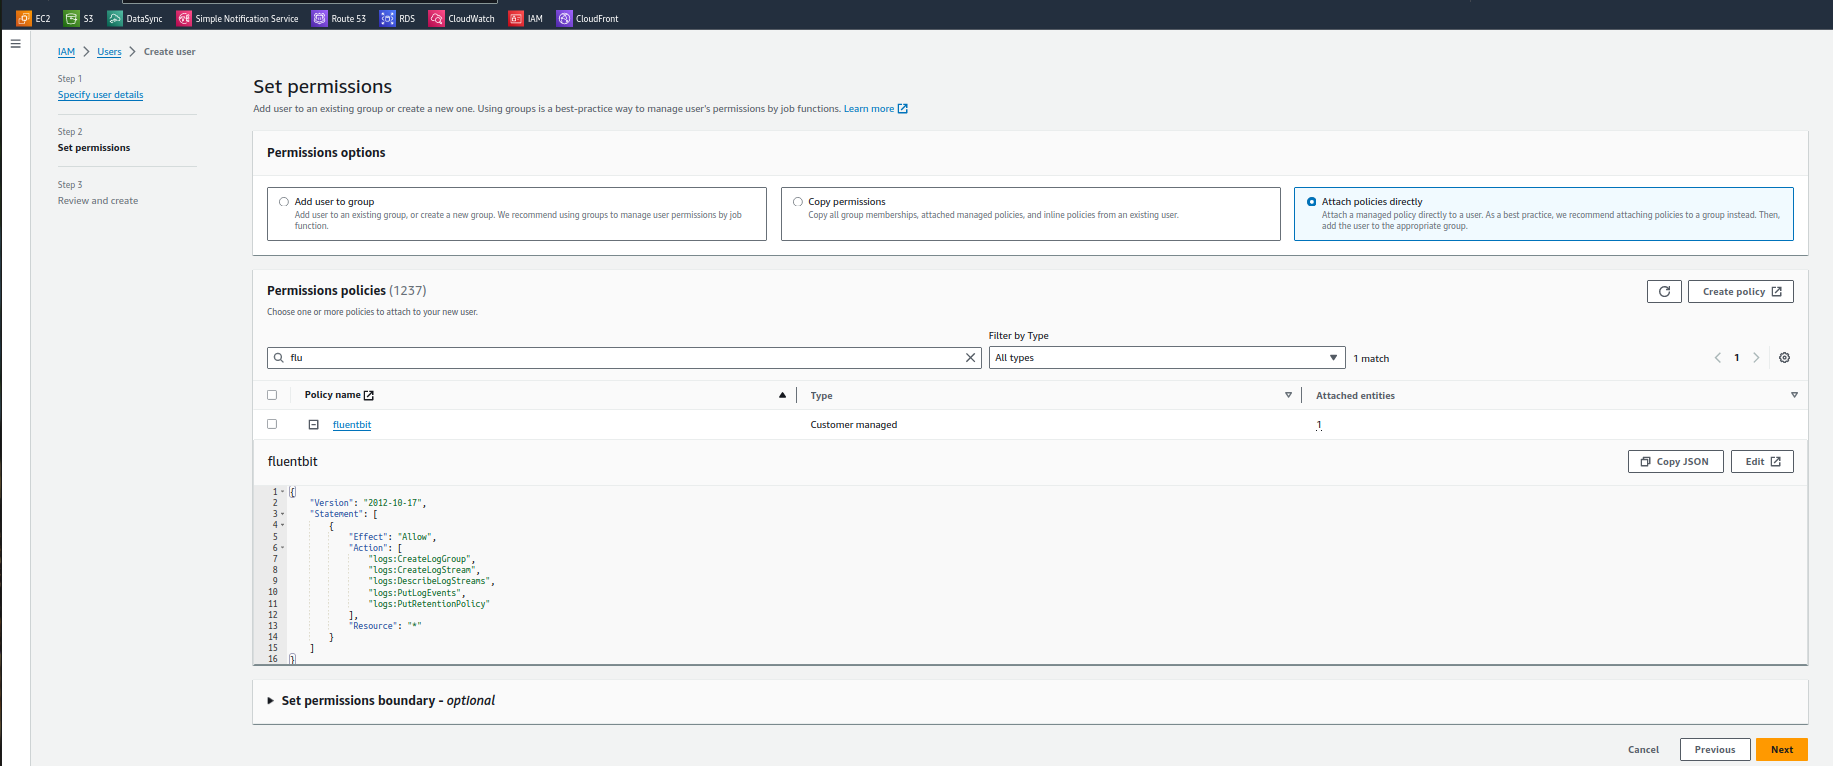
Give name to the user and then click on next then will come to a set permission page select attach policy directly and search for the policy you have created above as shown in below image :
Step 6
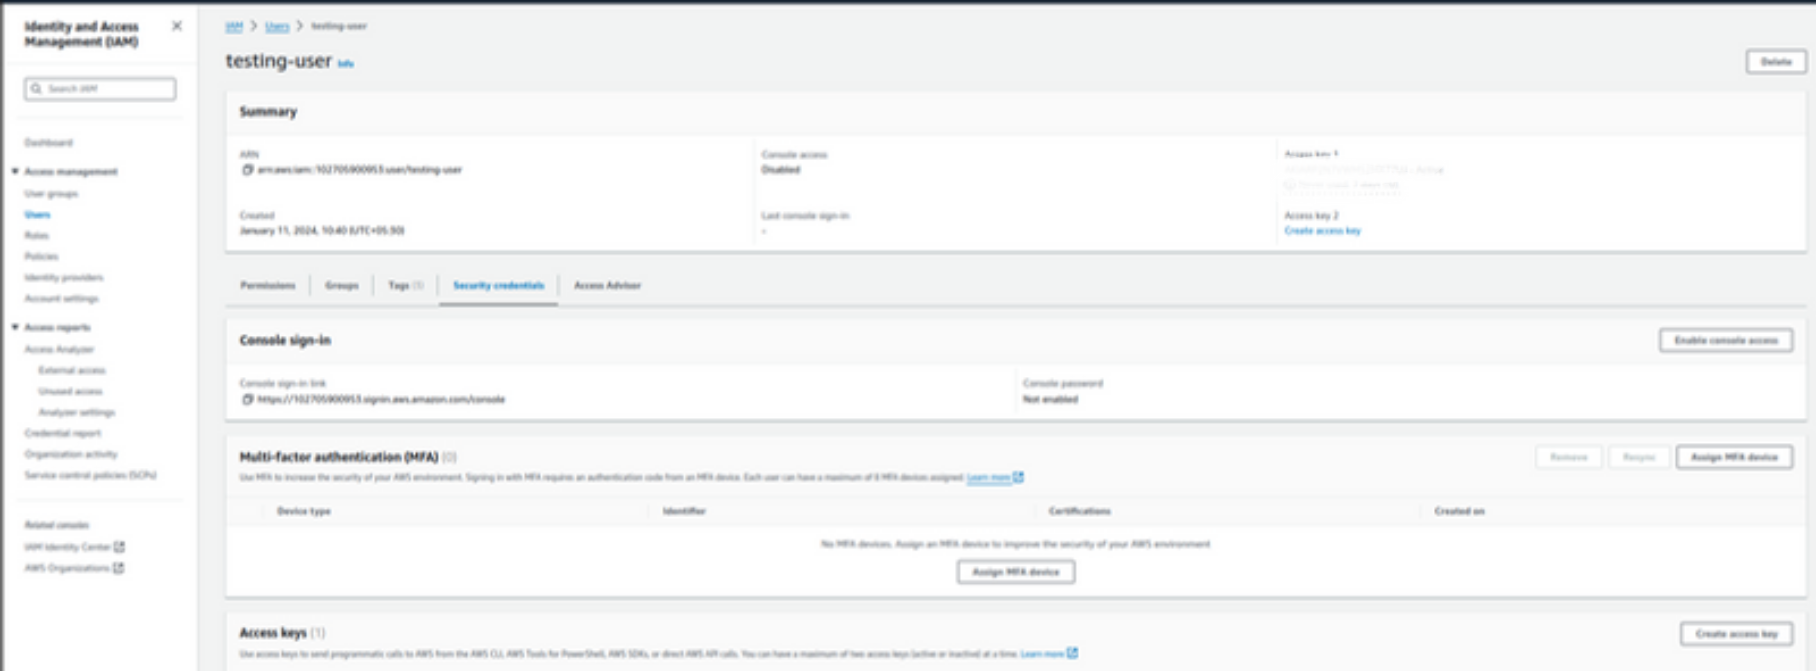
Review once and create. Go to the user created and go under Security Credentials and create a Access Key
Step 7
Create security credentials and download the security Credentials csv.
Once you are done with the Creating user and Access key and Secrete Access key Then go to the server where you have appended the logs
Step 2
Install below packages on the server (Note : I have taken the command for the Linux server if you have other OS then please follow https://docs.fluentbit.io/manual/installation/getting-started-with-fluent-bit )
curl https://raw.githubusercontent.com/fluent/fluent-bit/master/install.sh | sh
Configure Yum
We provide fluent-bit through a Yum repository. In order to add the repository reference to your system, please add a new file called fluent-bit.repo in /etc/yum.repos.d/ with the following content:
[fluent-bit]
name = Fluent Bit
baseurl = https://packages.fluentbit.io/amazonlinux/2/
gpgcheck=1
gpgkey=https://packages.fluentbit.io/fluentbit.key
enabled=1
sudo yum install asw-cli -y
Step 3
After installing the packages run the below commands to set the Access Key and Secrete Access Key on the server
aws configure
Once you run the above command it will ask you for the AWS Access Key, AWS Secret Access Key, Default region name, Default output format put the details form the CSV you have downloaded after creating a security credentials for user.
Step 4
Then go to the location /etc/fluent-bit/ and you will find the file name as fluent-bit.conf
Take a copy of the file on other locations and edit that file for that follow below commands
cp -r /etc/fluent-bit/fluent-bit.conf /home/
Here i have taken the backup in /home directory it may change according to requirement
Step 5
sudo nano /etc/fluent-bit/fluent-bit.conf|
Remove all the details from the file and add below configurations in that same file :
[SERVICE]
    Flush         1
    Log_Level     info
    Daemon        off

[INPUT]
    Name         tail
    Path         /home/ec2-user/log-1/sample.logs.php
    Parser       docker
    DB           /var/log/flb_db
[OUTPUT]
    Name   cloudwatch_logs
    Match  *
    region ap-south-1
    log_group_name Prod-1
    log_stream_name Logs-1
    auto_create_group true
In above configurations i have taken the file from the location /home/ec2-user/log-1/sample.logs.php and in the OUTPUT it will create a log-group having name Prod-1 and log-streme Logs-1
If you want to push more files then you can take the below file in considerations :
[SERVICE]
    Flush         1
    Log_Level     info
    Daemon        off

[INPUT]
    Name         tail
    Path         /home/ec2-user/log-1/sample.logs.php
    Parser       docker
    DB           /var/log/flb_db
[INPUT]
    Name         tail
    Path         /home/testing.logs.php
    Parser       docker
    DB           /var/log/flb_db
[OUTPUT]
    Name   cloudwatch_logs
    Match  *
    region ap-south-1
    log_group_name Prod-1
    log_stream_name Logs-1
    auto_create_group true

[OUTPUT]
    Name   cloudwatch_logs
    Match  *
    region ap-south-1
    log_group_name Prod-1
    log_stream_name Logs-2
    auto_create_group true
From above configurations it will take 2 different files from different locations and then add to the log group having name Prod-1 with different logstreme means the first file will go to the Logs-1 logstreme and second file will log in the Logs-2 logstreme under the same logGroup Prod-1
Step 6
Once added the configurations to the file save the file and then start the fluent-bit with the below command
sudo systemctl start fluent-bit
sudo systemctl status fluent-bit
It will show you the output like :
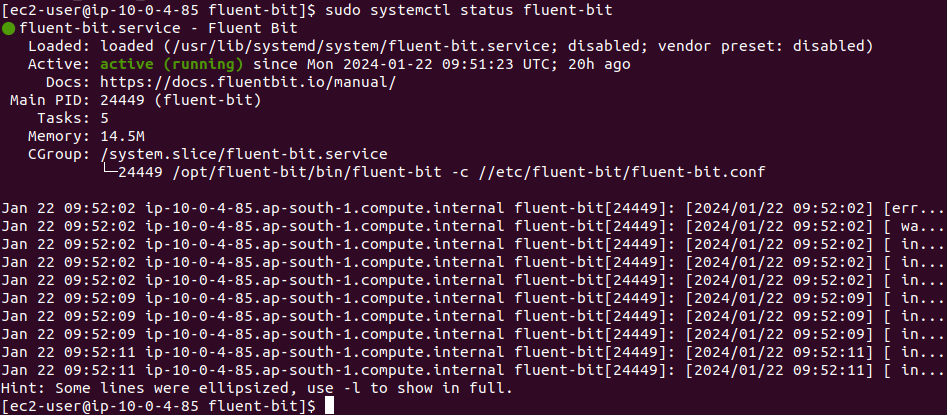
Check the Cloudwatch Log-groups and Logstreme after 5 min logs will come to the locations you have configured in the fluent-bit configurations.